


If you are interested in using our feed widget, but you are not sure how to customize it, read on. Here's a gentle guide that will show you how to create a great looking feed that fits with your site design. The great thing about the widget is that you can make it look like it was created just for your website. You'll need knowledge of CSS to be able to style your widget, there are lots of great resources available online to get you started.
For this example, we'll create a twitter feed widget using our twitter account at http://twitter.com/surfingwaves. As public acccess to third party Twitter feeds is no longer available, we'll use our news feed URL. We'll also remove some of the redundant code that is not required when using a custom style sheet. The finished product can be seen on the right. Let's get cracking!
Create a Background Image for Your Custom Widget
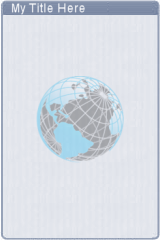
The easiest way to get a great looking widget is to use a background image. With an image you can create a nice border, include your company logo, or photo of your grandma if you so choose. Make sure the image is the size that you want your widget to be. We'll be using a 160x240px image, it will fit just nicely into the sidebar of our imaginary website. We won't go into the details of creating the image, as with CSS, there are plenty of web resources if you are unsure. Here's our background:
Customize the Widget and Get the Embed Code
Using the feed widget interface, edit the advanced options in each panel until you have the required functionality. Many of the options will not be relevant, as the values will all be taken from the custom CSS that we will create. Here is a list of the options that can be changed, and the options that we selected for our example. Ones that are not mentioned will be overwritten by the custom CSS entries.
Feed URL
- Enter your feed url. (we used http://fetchrss.com/rss/62936b2d42f9f5518d3c3302629367293860ab077b5c1ec2.xml)
General Settings
- Specify the width and weight of your widget. ( Width:160px Height 240px)
- Autoscroll (on)
- Scroll step: seconds . (we used 8 seconds for the scroll step)
- Widget with scroll bar (off - we are using the auto scroll, the tweets will scroll automatically every 8 seconds)
- Link open (New window - this will open the twitter page in a new browser window)
- URL of custom CSS (input the url of the CSS file that you will be creating and uploading)
Main Title
- Feed title (on). In this example, we are using the background image to display the title, so we need to have a feed title.
- Title name ( single space " "). The single space ensures that the title bar will format properly and the scroll will not obscure the title.
Entry Title
- maximum length (130)
- Source icon (on). This displays the twitter icon next to every post title. This can be handy as a visual source reference when you are using several different feeds from different sources.
Entry Contents
- Contents (off). We don't want the contents to display. In this case, where we are using the twitter feed, the entry content is a duplicate of the title.
- Maximum length is now not relevant for our example.
- Html (image / links) (off). Again, not relevant for the twitter example.
Feed Footer
- Feed footer (on). As with the Title, our image provides the footer detail. We still want the footer to be included for the correct display of our widget.
Now you have the widget functionality you have the embed code you need to paste into your web page. Next, we need to create the CSS file that will contain the widget display styles.
Create and Upload the Custom CSS File
The default display entries, such as border and font colors will be overwritten when you specify the use of your custom CSS file. These need to be specified in the style sheet. Here you specify how your widget looks. This is where your knowledge of CSS comes in.
Using a Custom CSS
Here's the html layout of the widget. With this in mind, you can create your custom CSS file and upload it to your server.
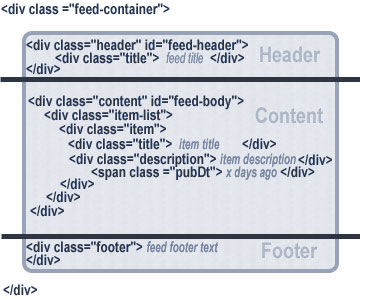
If you have access to your feed source, you can add your own classes to further customize your feed widget.
The CSS We Use In Our Example
Here's the contents of our style sheet.
body{margin:0;padding:0;background-image:url(/images/ex-twitter.jpg);}
.feed-container{font-size:11px;font-family:"Trebuchet MS",Helvetica,Arial,Sans-serif;}
.feed-container .header{margin:0px;padding:3px 3px 3px 3px;}
.feed-container .footer{display:none;padding:5px 5px 5px 5px;}
.feed-container .content{margin:3px;padding:0 3px;}
.feed-container .content .item{margin:0 0 7px 0;padding:0 0 7px 0;border-bottom:1px solid #CCCCCC;}
.feed-container .content .item .title{color:#105289;text-decoration:none;}
.feed-container .content .item .title a:link{color:#105289;text-decoration:none;}
.feed-container .content .item .title a:visited{color:#5a4860;text-decoration:none;}
.feed-container .content .item .title a:hover{color:#BC2A4D;text-decoration:none;}
.feed-container .content .item .title a:active{color:#105289;text-decoration:none;}
.feed-container .content .item .description a{text-decoration:none;color:#3399ff;}
.feed-container .content .item .description a:hover{text-decoration:underline;color:#6699ff;}
We have a number of examples of feeds, each with it's own style sheet. Take a look at the CSS source.